


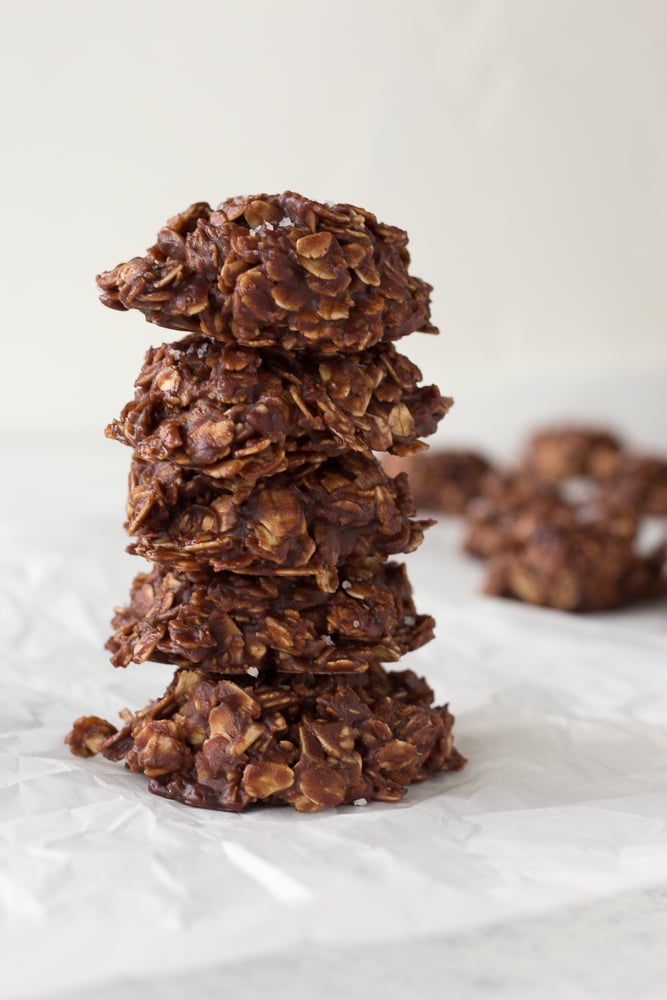
These No Bake Chocolate Oatmeal Peanut Butter Cookies are the best for when you want a gluten free treat but don’t have a lot of time. Made with cocoa powder, maple syrup, and old fashioned oats, they might even be considered healthy. This is a classic cookie recipe that kids absolutely love!
As an Amazon Associate, I earn from qualifying purchases.
Did you know no bake cookies are a thing? They totally are, and these no bake chocolate oatmeal peanut butter cookies are where it’s at. Even though they’re a mouthful to say, they are SO easy to make, require the tiniest effort, and taste seriously amazing.
My mom used to make a version of these when I was young and I remember looking at the little stacks of chocolate and oats and barely being able to contain myself. The hardest part was waiting for them to cool enough to become solid!
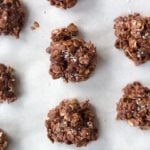
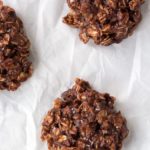
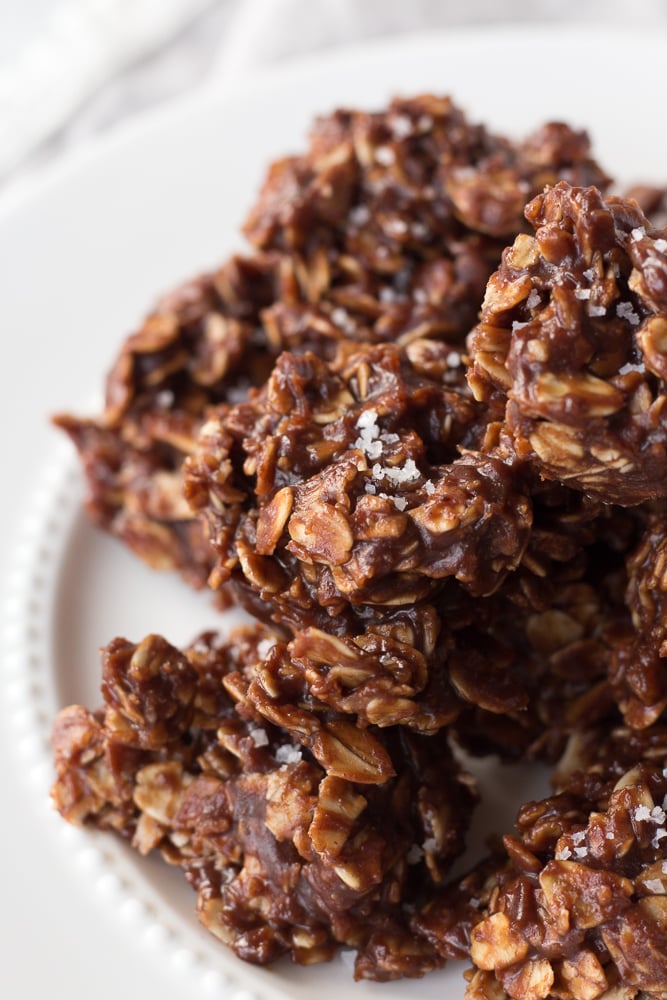
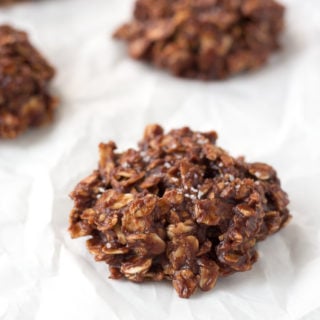
I gave a slight upgrade to my childhood version by adding a pinch of flaky salt on top of each cookie. This small step really makes the cookie, balancing the sweet and the salty. I promise once you try this no fail recipe you will be hooked.
Let’s get to it!
How To Make No Bake Chocolate Oatmeal Peanut Butter Cookies
Step 1: Prep the recipe
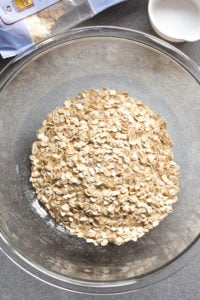
Measure the old fashioned oats with a measuring cup and place them in a large bowl. Take out a sheet pan and place parchment paper or a silicone mat on top of it. Set both aside.
Step 2: Make the chocolate mixture
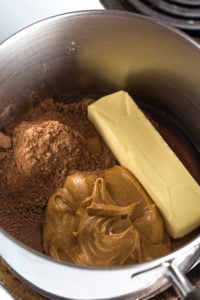
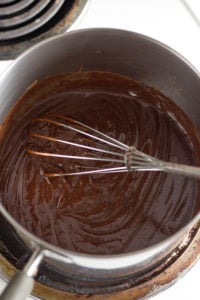
Put a medium sauce pan on the stove over medium heat. Measure out the maple syrup, butter, cacao powder, and creamy peanut butter and place them in the sauce pan. Stir with a whisk until heated through and well combined (3 to 5 minutes), then pour them oven the oats in the bowl.
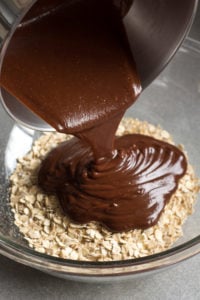

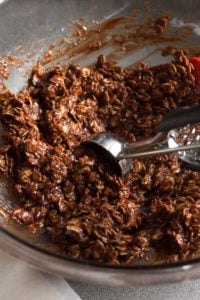
Use the spatula to combine the oats and chocolate mixture until all the oats are well covered.
Step 3: Form the cookies
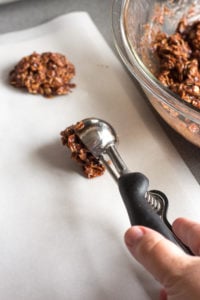
Using a cookie scoop (or a large spoon), scoop out 3 to 4 tablespoons of the chocolate mixture and place it on the covered sheet pan. (You can also do smaller cookies of 1 to 2 tablespoons.) Gently form into a stack or ball if necessary (the mixture will only loosely hold together).
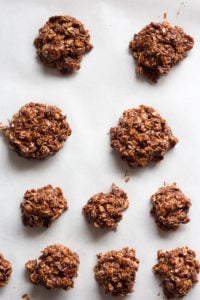
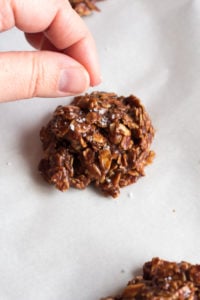
Repeat until all of the mixture is gone, spacing the stacks at least half an inch apart. Measure out ½ teaspoon of flaky salt and sprinkle a pinch on to the top of each cookie.
Step 4: Cool the cookies
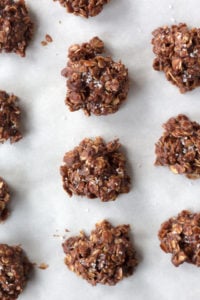
Place the sheet pan with the cookies in the fridge or freezer to cool and set. For the fridge they need about 1 hour. For the freezer they need 20 to 30 minutes. Then eat and enjoy!
Now to answer a couple of quick questions about these cookies.
Can I Use Foil Instead of Parchment Paper for Cookies?
In this recipe, you certainly can but you’ll need to spray the foil with a cooking spray (or oil) before putting the cookies down. Foil doesn’t release the cookies as well as parchment paper. If you don’t have parchment paper I suggest using a silicone mat if you have one, or just use the plain sheet pan and spray that with cooking spray.
Do the Cookies Harden as They Cool?
Yes, these cookies will harden and firm up as they cool. The butter and peanut butter in the cookies are what get firm as they cool.
Cooking Tips
- This recipe calls for cacao powder. You can use unsweetened cocoa powder in its place if you can’t find cacao powder, but don’t use cocoa powder that’s already been sweetened as it will affect the taste of the cookies.
- Stir the chocolate mixture with the whisk while it’s heating up so as not to burn the mixture.
- Shape the cookie however you like! I prefer more of a haystack look, but you can flatten it out a bit with your fingers to look like a typical cookie.
- Don’t skip adding a pinch of salt on top of each cookie! It really enhances the flavor of the cookie. Coarse, flaky salt (like fleur de sel) is best, but a medium grain salt like kosher salt will do in a pinch
Recipe Variations
- Replace the peanut butter with any nut butter – almond or cashew work well, or even sun butter to make this nut free!
- Make this recipe dairy free by replacing the butter with coconut oil (or ghee if you can handle that).
- You can use quick-cooking oats with this recipe instead of old fashioned oats if you prefer.
Pin These No Bake Chocolate Oatmeal Peanut Butter Cookies for Later!
NEED MORE GLUTEN FREE DESSERT RECIPES? CHECK THESE OUT.
- Healthy Apple Crisp
- Gluten Free Poppyseed Pound Cake
- Crustless Banana Cream Pie Cups
- Gluten Free Blueberry Peach Crisp
- Raspberry Peach Nice Cream
OR MAYBE YOU WANT MORE CHOCOLATE RECIPES? TRY THESE!
- Gluten Free Banana Chocolate Chip Muffins
- Dessert Yogurt Bowl
- White Chocolate Candied Lemon Slices
- Gluten Free Chocolate Chip Pumpkin Bread
- Cranberry Orange Chocolate Bark
If you make these No Bake Chocolate Oatmeal Peanut Butter Cookies (or any other recipe) then don’t forget to rate the recipe and let me know how it went in the comments below!
YOU CAN ALSO FOLLOW ME ON FACEBOOK, INSTAGRAM, AND PINTEREST TO SEE MORE GOOD TO EAT, GLUTEN FREE FOOD.
No Bake Chocolate Oatmeal Peanut Butter Cookies
Equipment
Ingredients
- 2 cups old fashioned oats make sure they're labeled gluten free
- ½ cup maple syrup
- ½ cup butter
- ½ cup creamy peanut butter
- ¼ cup cacao powder
- ½ teaspoon vanilla extract
- ½ teaspoon flaky salt
Instructions
- Measure the old fashioned oats with a measuring cup and place them in a large bowl. Take out a sheet pan and place parchment paper or a silicone mat on top of it. Set both aside.
- Put a medium sauce pan on the stove over medium heat. Measure out the maple syrup, butter, cocoa powder, and creamy peanut butter and place them in the sauce pan. Stir with a whisk until heated through and well combined, then pour them oven the oats in the bowl. Use the spatula to combine the oats and chocolate mixture until all the oats are well covered.
- Using a cookie scoop (or a large spoon), scoop out 3 to 4 tablespoons of the chocolate mixture and place it on the covered sheet pan. (You can also do smaller cookies of 1 to 2 tablespoons.) Gently form into a stack or ball if necessary (the mixture will only loosely hold together). Repeat until all of the mixture is gone, spacing the stacks at least half an inch apart. Measure out ½ teaspoon of flaky salt and sprinkle a pinch on to the top of each cookie.
- Place the sheet pan with the cookies in the fridge or freezer to cool and set. For the fridge they need about 1 hour. For the freezer they need 20 to 30 minutes. Then eat and enjoy!

Kelly
Hi Taryn!
I just made these, they’re cooling in my fridge right now, yum! Made for a healthy Valentine’s day treat for the family. Tastes delicious so far! I was just wondering how do you store them? Keep it in the fridge or room temp? Thanks for this great simple and yummy recipe!
Taryn Solie
Hi Kelly! I’m so glad you’re liking these cookies! You’ll want to store them in a container in the fridge over the short term (5 to 7 days), or you can store them in the freezer if you want to keep them longer (I would say about a month). Hope that helps!
Suzanne
These sound very similar to the Mississippi Mud Cookies that I grew up eating. We all loved them! I will have to try these out!
Taryn Solie
So happy to hear you loved them Suzanne!