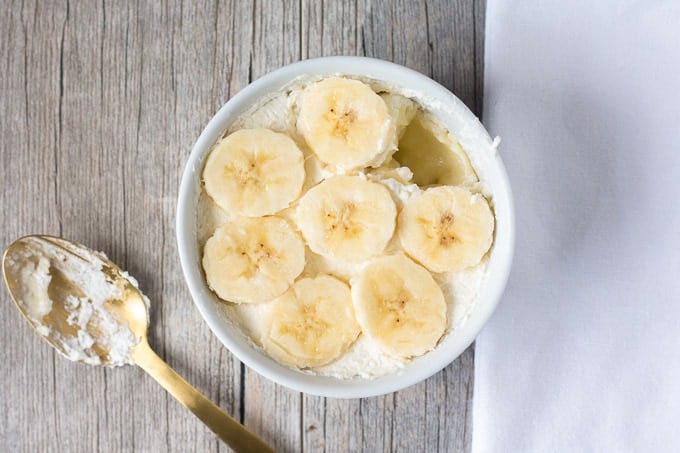
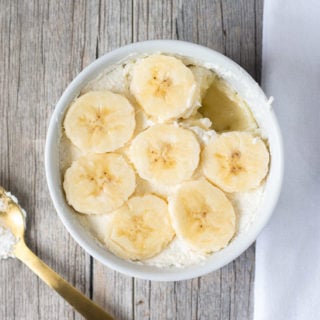
These Crustless Banana Cream Pie Cups have only 8 ingredients and are heaven in a cup. They have a smooth and creamy texture, with bites of banana added in. As always, they’re gluten free. Great for a fun dinner gathering, or double the recipe for a larger group.
Banana cream pie is something I have fond memories of. Before anyone in my family was gluten-free, my mom would make it for a special occasion – someone’s birthday, Christmas, Easter.
If there were any leftovers they would get eaten for breakfast the next day. It tasted that good.
After going gluten and dairy free, my mom stopped making it. And I realized if I ever wanted to taste it again I had better make my own.
So here is a crustless, gluten free version of my mom’s banana cream pie, in a cup.
How To Make The Banana Cream Pie Filling
First separate three eggs, reserving the yolks in a bowl. You can keep the egg whites if you can find another use for them, but you won’t need them for the cream.
Next take out the ramekins you’re using. Peel the bananas and cut them into small coins, placing about half a banana in each ramekin.
Now onto the cream.
Pour the sugar and corn starch into a large sauce pan, then stir with a whisk to combine.
Gradually pour in the milk, stirring to make sure it incorporates.
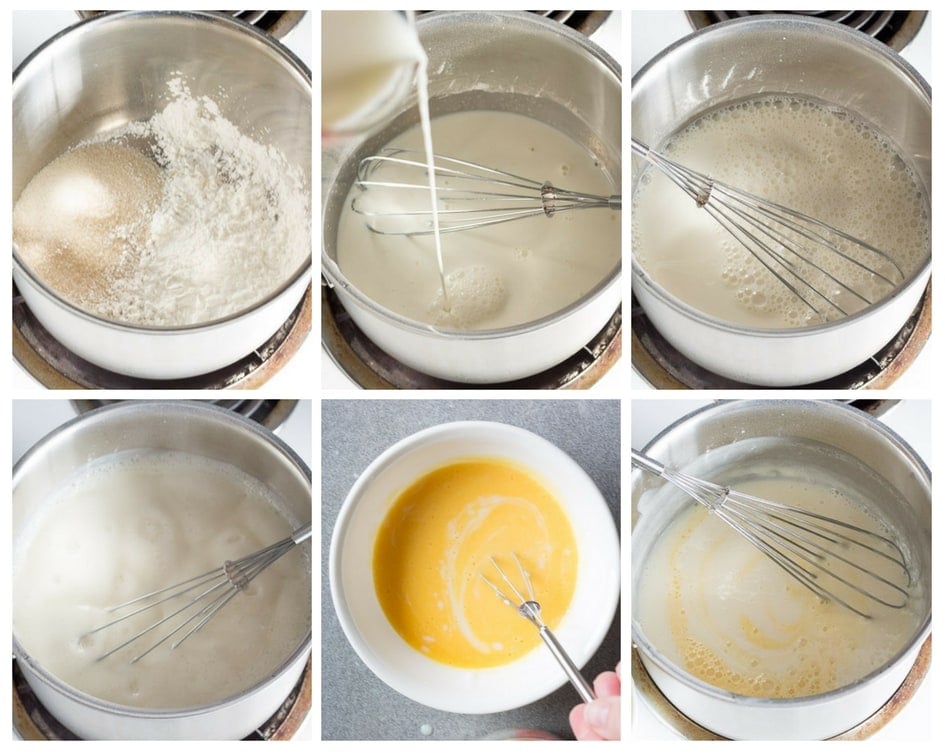
Now’s where you need to pay attention. Place the pan over medium-high heat and stir the mixture continuously until it starts to boil. It should look like the picture on the bottom-left in the collage above. Then keep stirring for 2 more minutes.
If you don’t stir the mixture continuously it will scorch and you will wind up with little brown flecks. Nobody wants little brown flecks in their dessert.
Now remove the pan from the burner.
Pour 1 cup of milk mixture into a liquid measuring cup. Grab those egg yolks and mix them a bit, then slowly pour the cup of milk mixture into the eggs, stirring as you go (see the middle-bottom picture in the collage above).
Don’t pour the eggs straight into the pan! If you do, you will cook the eggs due to the high temperature of the mixture and wind up with little pieces of hard egg yolk. Which will be gross.
Once the eggs and milk mixture are combined, pour it into the large sauce pan. Add in the vanilla and butter and mix everything together until it’s all incorporated.
How To Fill The Pie Cups
Next you want to grab the ramekins filled with banana slices and pour the milk mixture over the bananas.
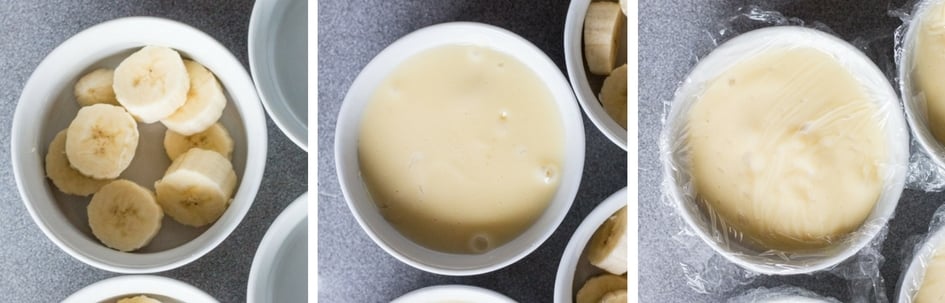
If any bananas are poking up, just use a utensil (or your finger) to push it down so the surface is flat (as pictured in the middle picture above).
Using plastic wrap, cover each ramekin making sure that the plastic wrap touches the whole surface of the pie cup filling. Otherwise the filling will develop a rubbery layer on top, which tastes as you’d expect – rubbery.
Now you can place the ramekins into the fridge to cool and firm up. I like to leave them in overnight, but 3 or 4 hours will be fine.
If you’re short on time, you can place them in the freezer for about an hour, then pop them in the fridge until you’re ready to serve them.
How To Prepare The Topping
You want to top the dessert just before you’re ready to serve it.
Measure out half a cup of whipped cream, pour it into a medium bowl and whip it up with a hand mixer.
There are a number of tutorials on how to do this, so I won’t attempt to explain. Instead here are some video links to check out:
Real Simple
Food Network
The Kitchn
One note – the recipe doesn’t call for anything in the whipped cream (like sugar or vanilla). This is because the filling is very sweet and the plain whipped cream helps offset that.
How To Top The Pie Cups
You can pile the whipped cream on top of the pie cups any way you like.
Place a dollap on top, spread it out in an even layer and place sliced bananas on top, or even put it in a piping bag and make fun shapes (though you’ll need to whip the cream until it’s fairly stiff to do this).

Then serve and enjoy!
If you’re looking for more dessert recipes, then check these out:
- White Chocolate Candied Lemon Slices
- Gluten Free Poppyseed Pound Cake
- Cranberry Orange Dark Chocolate Bark
- Gluten Free Blueberry Peach Crisp
- Raspberry Peach Nice Cream
Now two last things to note about this recipe.
1) It is rich. Very rich. The recipe calls for 4 servings, but even at a roughly 1 cup serving size it’s a pretty large serving. You could easily make it into 6 servings by slicing up three bananas into 6 ramekins, then pouring the milk mixture into all six cups. You might have some banana peaking through, but just cover it with whipped cream, and
2) When you’re mixing the filling in the pan, be sure and scrape the bottom. Otherwise – you guessed it – the mixture will burn and you’ll get those brown flecks I talked about before. Edible but gross.
If you’ve tried this Crustless Banana Cream Pie Cup recipe (or any other recipe) then don’t forget to rate the recipe and let me know how it went in the comments below. Seriously, I love hearing from you!
You can also FOLLOW ME on FACEBOOK, TWITTER, INSTAGRAM and PINTEREST to see more good to eat, gluten free food and how I’m trying to get my kids into the kitchen more.
Pin These Crustless Banana Cream Pie Cups for Later!
Recipe for Crustless Banana Cream Pie Cups
Ingredients
- 3 eggs
- 2 large bananas
- ¾ cup granulated sugar
- ¼ cup corn starch
- 3 cups whole milk
- 1.5 teaspoons vanilla
- 1 tablespoon butter
- ½ cup whipping cream
- Optional: 1 large banana for topping
Instructions
Items Needed:
- A medium-sized bowl
- Four ramekins (about 1 to 1.5 cups in size).
- A small sharp knife
- A large sauce pan
- Measuring cups (for sugar and starch)
- A liquid measuring cup (for milk)
- A medium to large whisk
- A hand or stand mixer
Directions:
- Separate three eggs, putting the yolks into a medium-sized bowl. Either toss or save the egg whites if you can use them (they are not needed for the recipe). Set aside.
- Take out the four ramekins. Peel two bananas and using a small sharp knife, cut them into coins that are about ¼ inch thick. You can cut them over the ramekins, letting each the pieces fall into the ramekin. Roughly half a banana should go into each ramekin. Set aside.
- In a large sauce pan, place the sugar and corn starch. Stir with a whisk to combine.
- Gradually pour the milk into the sauce pan, stirring with the whisk to mix thoroughly as you pour.
- Place the sauce pan on a stove burner and turn to medium-high heat. Stir the milk mixture continuously with the whisk until it starts to boil, which should take between roughly 5 minutes. If you don’t stir the mixture continuously it will scorch and you will wind up with brown flecks.
- Once the mixture starts boiling, keep cooking and stirring for 2 more minutes. Remove the pan from the burner.
- Pour 1 cup of milk mixture into the liquid measuring cup. Slightly beat the eggs, then slowly pour the cup of milk mixture into the eggs, stirring as you go. Once the eggs and milk mixture are combined, pour it into the large sauce pan and stir to thoroughly combine. (Don’t pour the eggs straight into the pan, as the mixture will be too hot and will cook the eggs, giving you little pieces of hard egg yolk.) Remove the pan from the burner.
- Add the vanilla and butter to the sauce pan and mix together with the whisk until both are incorporated.
- Pour the milk mixture into the ramekins in even amounts. There should be enough to cover the banana pieces.
- Place pieces of plastic wrap on top of the mixture in the ramekins, making sure the plastic touches the full surface so a tough skin doesn’t form on the top. Stick the ramekins into the refrigerator for 3 to 4 hours, or overnight. (Alternatively you can place the ramekins in the freezer for about an hour, then stick them in the fridge until they’re ready to serve.)
- Before serving, pour the whipping cream into a medium size bowl and beat with a hand or stand mixer (or by hand if you’re ambitious) until it stiffens.
- Take the ramekins out of the refrigerator and place a dollar of whipped cream onto the top of each one. Or spread the whipped cream into a thin layer, and using the extra optional banana, cut it into thin coins and place in a single layer on top of the whipped cream. If you want to be fancy you can also spoon the whipped cream into a pastry bag and pipe the whipped cream onto each ramekin.
- Serve with a spoon and enjoy!
Notes
- When you’re stirring the milk mixture as it’s boiling, be sure to scrape the bottom of the pan as you go. If you don’t, there will be bits of burned mixture and you will get brown flecks. They’re edible, but will throw off the texture and creaminess of the dessert.
Bridy
Corn starch is not paleo or whole 30. What can I use instead?
Taryn Solie
I would use arrowroot powder in place of corn starch.
Karen Rajan
Hi Taryn,
Please excuse my ignorance but don’t you bake these banana cream pie cups? How else would the egg yolks be cooked? Just from the warm milk?
Thank you!!!
Karen
Taryn Solie
Hi Karen,
You guessed it – the heat of the milk will cook the eggs. Which is why you have to add a bit of the milk to the eggs carefully, then incorporate that into the main milk mixture. Otherwise you’ll end up with cooked egg pieces in your filling. 🙂
Shelley
Just made these and they look so yummy! I’m wondering if they can be frozen?
Taryn Solie
Hi Shelly! I haven’t tried freezing them. While I think the creamy filling would likely be fine, the bananas might be watery once defrosted. If you try it please let me know how it turned out!