

Learn how to dry brine a turkey with this simple tutorial. Whether you’re doing a smoked turkey or cooking it in the oven, learn how easy it is with step by step instructions, photos, and a video to walk you through. This recipe is the perfect addition to your Thanksgiving table.
Dry brining a turkey is a super simple way to impart a lot of flavor with little effort. I have been dry brining my Thanksgiving turkey for years and it always turns out moist and flavorful. You can even listen as I give you a walk-through of dry brining a turkey in episode 46 of the Grill Like A Mother podcast (the audio is also available in the recipe card at the bottom of this post).
If you want the full instructions for how I cook our Thanksgiving turkey, click to go to my smoked turkey recipe.
Okay, back to dry brining.
To do an effective dry brine, you will need a couple key things:
- An uncooked and thawed turkey that hasn’t had anything put in or on it – no saline injections or other methods. If you’re confused about this, just look at the label or ask your butcher.
- Time. The dry brine needs to sit on the turkey for at least 24 hours (though can go for up to 72 hours).
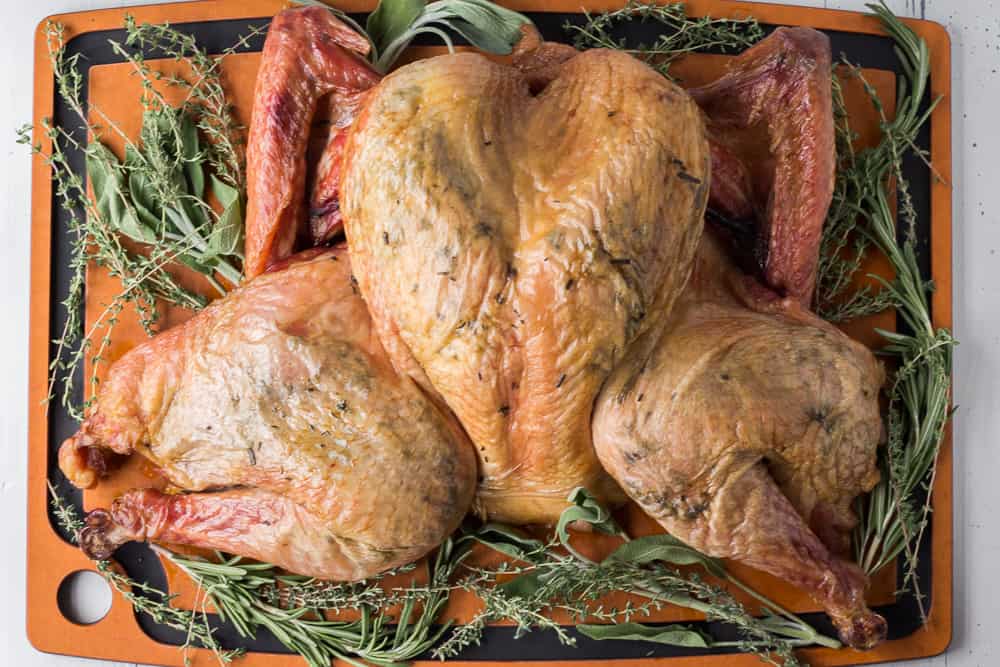
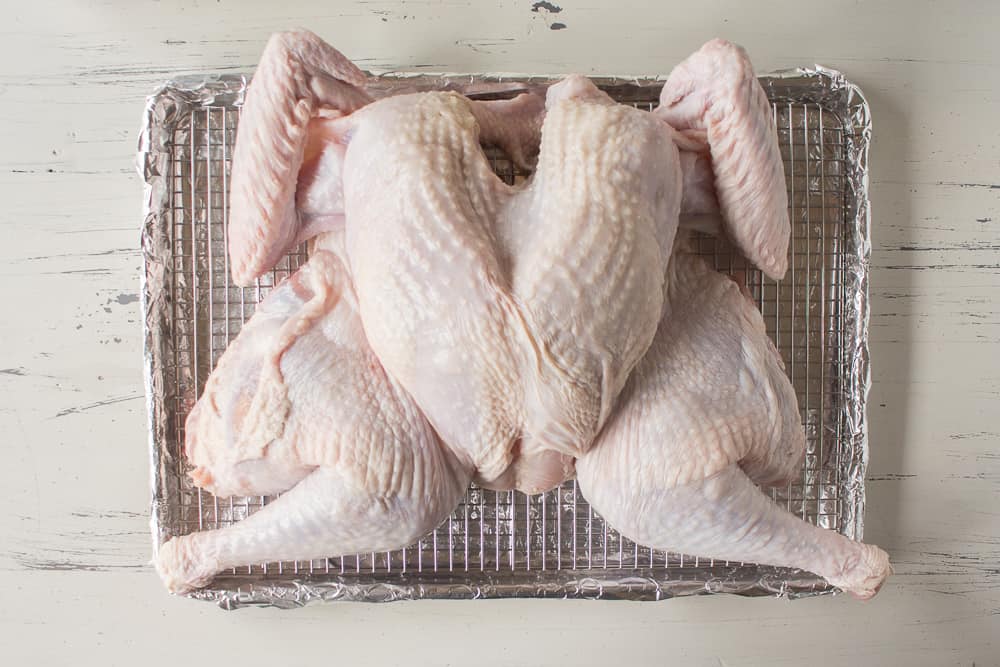
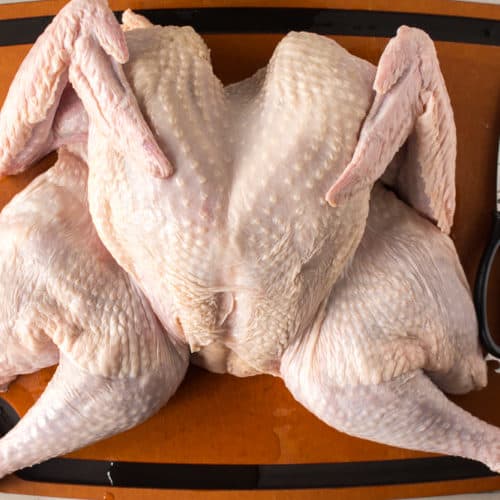
I highly recommend doing a dry brine on a spatchcocked turkey – which means the backbone has been cut out so that the turkey can lie flat. This ensures that the turkey will cook more evenly, and you’ll be able to salt the turkey more easily to.
I’ve written a post on how to spatchcock a turkey with step by step photos and instructions, so check that out if you need help. You should also be able to ask a butcher to spatchcock it for you if you don’t want to do it yourself.
How To Dry Brine A Turkey
Step 1: Prep the turkey and the salt
First get a baking sheet pan and cover it with foil. Place a baking rack inside of it and set it aside (your turkey will go on this to dry brine).
Get the turkey out of the refrigerator. You will need to make sure your turkey is defrosted before you dry brine it. Place it on a large cutting board or in a large tray where you can easily access all surfaces of the bird.
Measure out the salt (I use Diamond Crystal kosher salt – Amazon affiliate link) and put it in a small bowl. You’ll want to keep it separate from the rest of the salt in your container or box as you’ll be touching the turkey and salt back and forth, and would contaminate the rest of the salt.
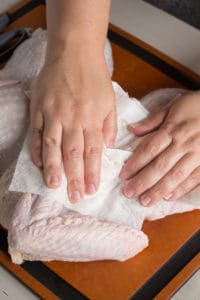
Use paper towels to dry off the turkey as best you can.
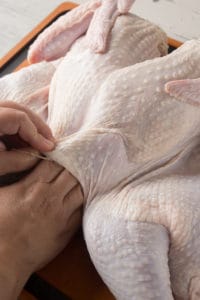
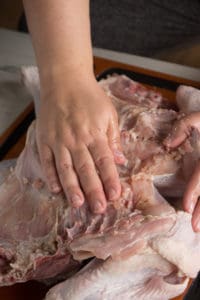
Lift the skin on one section of the turkey – I usually start at the tail end of the turkey – and gently push your finger between the skin and the meat. You may need to make small sweeping motions with your finger to separate the two as sometimes there’s a thin membrane that attaches them together.
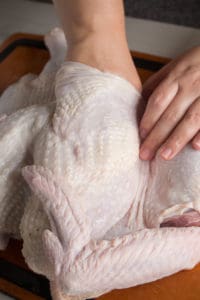
Keep separating the skin from the meat all the way along up to the other end of the bird along both breasts – at this point your wrist will be under turkey skin, which will feel weird but is what should happen! The skin of the bird is fairly tough and unless you have very sharp fingernails it should stay intact.
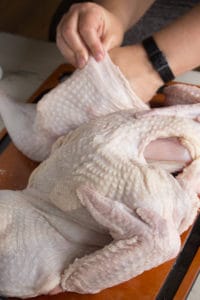
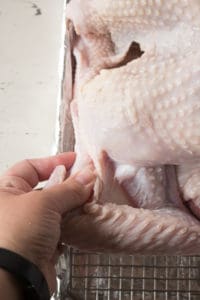
Next move on to thighs and legs, again separating the skin from the meat. This section is a little trickier as it can be hard to get to the wings, but just get down as far as you can. The further you get, the better, as it will allow you to put salt on more of the turkey’s surface area.
You won’t do this for the wings as it’s much harder to get under the skin for not as much meat.
Step 2: Salt the turkey
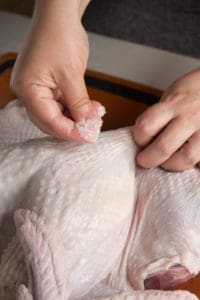
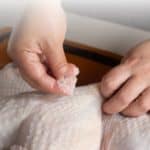
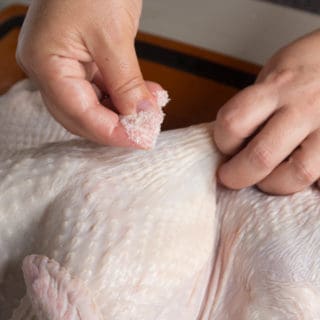
Next, take a teaspoon or two of salt between your fingers, lift up part of the skin on the bird with the other hand and rub the salt directly on the meat of the bird underneath the skin. Repeat this step until the breasts, thighs, and legs are all salted.
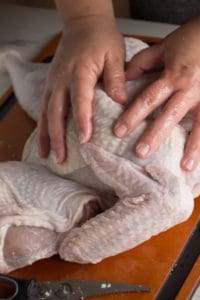
There should be a teaspoon or two of salt left over once this is done. Sprinkle half the remaining salt over the skin of the bird, rubbing the salt in with your hands.
Sprinkle the last little bit over the inside of the bird (or in the bird if your turkey is not spatchcocked). If the inside is wet, be sure and dry it off with a few more paper towels first.
Step 3: Let the turkey rest
Place the turkey on the wire rack that’s in the sheet pan and put it in the fridge to brine. Try to keep all of the turkey appendages on the sheet pan so they don’t poke out into other areas of your fridge. You may want to tuck the wings under the breasts as well.
You can cover it loosely with plastic wrap if you’re worried about rubbing against the raw meat, but don’t cover it too tightly as you want the skin to dry out a bit.
Leave the turkey in the fridge for at least 24 hours, but up to 72 hours (3 days). Be sure and remove it from the fridge at least 30 minutes before you plan to cook it, whichever method you choose.
You may have a couple of questions about dry brining a turkey – let’s get to those now.
What kind of turkey is best to dry brine?
You can dry brine any kind of turkey, just make sure it’s a raw turkey that is not pre-brined or injected with a saline solution! It will say on the label, or you can ask the butcher.
How long do you dry brine a turkey?
At minimum you want to dry brine a turkey for 24 hours, but you can go up to 72 hours (or 3 days). I typically dry brine mine for 2 days.
Do I rinse a dry brined turkey?
No, don’t rinse your turkey! You can cook it as is or rub some unsalted butter and herbs on it, but it will not be too salty.
Is it better to wet brine or dry brine a turkey?
In my opinion, a dry brine is easier than a wet brine. Also, typically a wet brine has herbs or aromatics in it but the flavor a wet brine imparts isn’t as much as a dry brine, where the salt has direct contact with the meat.
Which salt should I use?
For this recipe, I use Diamond Crystal kosher salt (Amazon affiliate link). Diamond Crystal kosher salt is less salty by weight than other kosher salts or table salts, meaning there’s more room for error when salting your food. The general rule of thumb is 1 teaspoon of kosher salt per pound of turkey – which again, this is using Diamond Crystal kosher salt
RECIPE TIPS
- As previously stated, this recipe uses Diamond Crystal kosher salt (Amazon affiliate link). If you have a different kind of salt, such as Morton’s kosher salt or table salt, read this article on the different types of salt and measurements by Cook’s Illustrated to help you figure out how much of each salt to use.
- Keep some paper towels nearby as your dry brine in case you run into any wet spots on your turkey, particularly in the crevasses. You don’t want to put salt on a wet turkey as it will just spill off, so mop up the wet spots, then salt the turkey.
- Clear a spot in your fridge for the turkey before you start to dry brine it! If you were thawing your turkey in the fridge you likely already have a good spot, but it’s best to double check before you begin so your turkey isn’t sitting out on the counter while you rearrange your fridge.
PIN THIS POST ON HOW TO DRY BRINE A TURKEY FOR LATER!
IF YOU NEED MORE HELP WITH A TURKEY, TAKE A LOOK AT THESE POSTS:
- How to Spatchcock a Turkey
- How to Make Turkey Stock (Whole30, Paleo, GF)
- Smoked Turkey Recipe (Whole30, Paleo, GF)
- Internal Temperature for Meats
- How to Use a Meat Thermometer
OR IF YOU’RE LOOKING FOR SOME THANKSGIVING RECIPES, CHECK THESE OUT:
- Gluten Free Stuffing (GF)
- Sautéed Green Beans with Shallots (Whole30, Paleo, GF)
- Honey Butter Roasted Carrots (GF)
- Maple Roasted Brussels Sprouts (Paleo, GF)
- Cornbread Muffins (GF, DF)
- Sweet Potato Casserole (GF)
If you make end up using this guide on How To Dry Brine A Turkey then don’t forget to rate the content and let me know how it went in the comments below!
YOU CAN ALSO FOLLOW ME ON FACEBOOK, INSTAGRAM AND PINTEREST TO SEE MORE GOOD TO EAT, GRILLED GLUTEN-FREE FOOD.
As an Amazon Associate, I earn from qualifying purchases.
How To Dry Brine A Turkey
Equipment
- A baking rack
Ingredients
- 14-15 pound turkey
- 6 tablespoons Diamond Crystal kosher salt
Instructions
- First get a baking sheet pan and cover it with foil. Place a baking rack inside of it and set it aside (your turkey will go on this to dry brine). Get the turkey out of the refrigerator. You will need to make sure your turkey is defrosted before you dry brine it. Place it on a large cutting board or in a large tray where you can easily access all surfaces of the bird.
- Measure out the salt (I use Diamond Crystal kosher salt – Amazon affiliate link) and put it in a small bowl. You’ll want to keep it separate from the rest of the salt in your container or box as you’ll be touching the turkey and salt back and forth, and would contaminate the rest of the salt.
- Use paper towels to dry off the turkey as best you can. Lift the skin on one section of the turkey – I usually start at the tail end of the turkey – and gently push your finger between the skin and the meat. You may need to make small sweeping motions with your finger to separate the two as sometimes there’s a thin membrane that attaches them together.
- Keep separating the skin from the meat all the way along up to the other end of the bird along both breasts – at this point your wrist will be under turkey skin, which will feel weird but is what should happen! The skin of the bird is fairly tough and unless you have very sharp fingernails it should stay intact.
- Next move on to thighs and legs, again separating the skin from the meat. This section is a little trickier as it can be hard to get to the wings, but just get down as far as you can. The further you get, the better, as it will allow you to put salt on more of the turkey’s surface area. You won’t do this for the wings as it’s much harder to get under the skin for not as much meat.
- Next, take a teaspoon or two of salt between your fingers, lift up part of the skin on the bird with the other hand and rub the salt directly on the meat of the bird underneath the skin. Repeat this step until the breasts, thighs, and legs are all salted. There should be a teaspoon or two of salt left over once this is done. Sprinkle half the remaining salt over the skin of the bird, rubbing the salt in with your hands. Sprinkle the last little bit over the inside of the bird (or in the bird if your turkey is not spatchcocked).
- Place the turkey on the wire rack that’s in the sheet pan and put it in the fridge to brine. Try to keep all of the turkey appendages on the sheet pan so they don’t poke out into other areas of your fridge. You may want to tuck the wings under the breasts as well. You can cover it loosely with plastic wrap if you’re worried about rubbing against the raw meat, but don’t cover it too tightly as you want the skin to dry out a bit.
- Leave the turkey in the fridge for at least 24 hours, but up to 72 hours (3 days). Be sure and remove it from the fridge at least 30 minutes before you plan to cook it, whichever method you choose.
Notes
- As previously stated, this recipe uses Diamond Crystal kosher salt(Amazon affiliate link). If you have a different kind of salt, such as Morton’s kosher salt or table salt, read this article on the different types of salt and measurements
by Cook’s Illustrated to help you figure out how much of each salt to use. - Keep some paper towels nearby as your dry brine in case you run into any wet spots on your turkey, particularly in the crevasses. You don’t want to put salt on a wet turkey as it will just spill off, so mop up the wet spots, then salt the turkey.
- Clear a spot in your fridge for the turkey before you start to dry brine it! If you were thawing your turkey in the fridge you likely already have a good spot, but it’s best to double check before you begin so your turkey isn’t sitting out on the counter while you rearrange your fridge.

Jan T
I have family members with high blood pressure. Will this add to the sodium count. Would a wet brine be better for them?
Taryn Solie
Hi Jan! Brining a bird (whether wet or dry brine) does add salt to the turkey because the turkey absorbs the sodium as it brines. I’m not sure which would add more – my hunch is it would depend on how much was used. I would do a little Google research on this to see which is better suited for your family – sorry I don’t have a more definitive answer!